Success Story: SONOTEC & University of Stuttgart

Institute for Machine Elements at the University of Stuttgart detects smallest fracture on gear flank surface with the help of a SONOTEC ultrasound sensor.
Recognize Bearing Damage early with Ultrasound
The intelligent networking of machines plays a crucial role in Industry 4.0. As a result, many machines are equipped with condition monitoring systems. Sensor data recorded on the machine is used to make statements about the condition of the machine or individual critical components. Condition monitoring detects damage at an early stage, so that unexpected machine failures can be prevented. For machine engineers, this results in added value in terms of operational safety as well as a financial advantage.
In the event of a gearbox malfunction, it can lead to an entire machine coming to a standstill. For this reason, gearboxes are particularly suitable for condition monitoring during operation. The main failure mechanisms of gearboxes show a gradual progression of damage. It is therefore possible to detect damage early before it reaches a critical stage. As soon as damage has been detected and the condition of the damage has been identified, the remaining service life of the gearbox can be estimated.
Current research investigates pitting damage
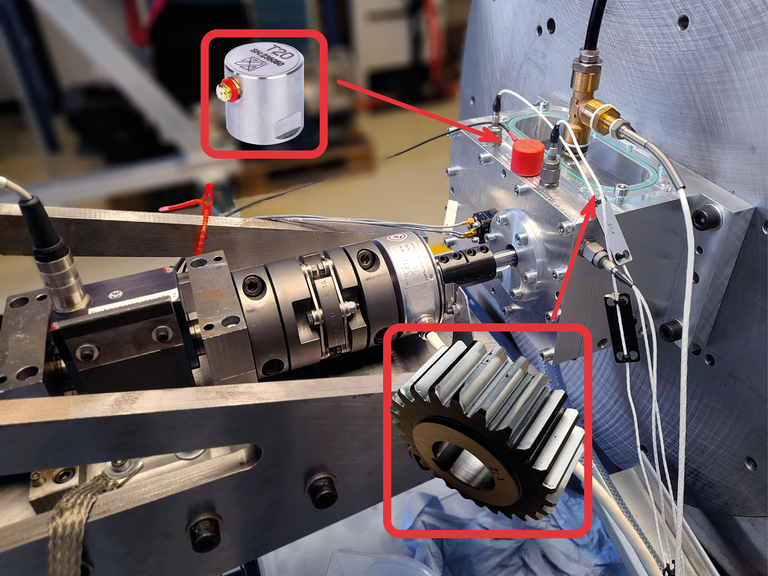
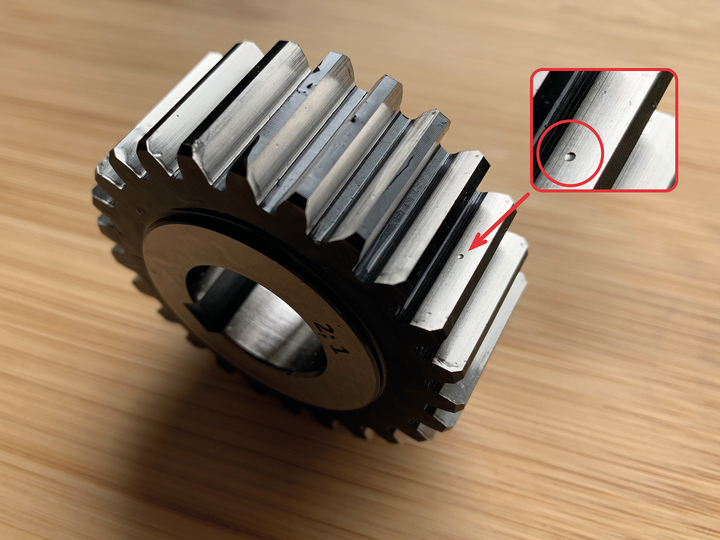
The focus of current research at the Institute for Machine Elements at the University of Stuttgart is on pitting damage. In cooperation with SONOTEC, a measurement technology manufacturer specializing in ultrasound, pitting damage on gears was investigated. In the process, damage could be detected well before the failure criterion standardized in DIN 3990-5 which is of an area fracture on a tooth flank surface of 4%. This is possible with suitable sensor technology. In a series of tests, synthetic pitting damage with area fracture between 0.4 % and 2 % of the area of a tooth flank was examined. In addition to the size of the pitting damage, the speed, torque, and lubricating oil viscosity were systematically varied in the tests. In this way, the detection capability of the pitting damage could be tested under different boundary conditions. Different accelerometers were used to collect sensor data during operation of the gears with pitting damage. Compared to the accelerometers, the pitting damage is clearly visible in the measured data of the T20 structure-borne sound probe from the manufacturer SONOTEC. Particularly in the ultrasonic frequency range above 16 kHz, the pitting damage is clearly detectable with the T20 structure-borne sound probe from SONOTEC. Thus, it is possible to reliably detect even the smallest examined pitting damage with area fracture of 0.4% of the area of a tooth flank.

SONOTEC Ultrasonic Probe T20 is perfectly suited for condition monitoring
The T20 structure-borne sound transducer differs from classic accelerometers by its innovative transducer principle. At its heart is a piezocomposite material developed and manufactured in-house by SONOTEC, through the use of which an almost linear frequency response with excellent sensor sensitivity is achieved. Due to this principle, SONOTEC's structure-borne sound transducers are much better suited for the detection of smallest mechanical impulses than conventional accelerometers. In the case of slow-running rolling bearings or in gear drives, damage can thus be detected much earlier, which is of particular importance for successful condition monitoring.
Compact Ultrasonic Probe T20 for Condition Monitoring · SONOTEC
Wide range of applications
The range of applications for condition monitoring with estimation of remaining service life is broad. One example is offshore wind turbines. Due to the difficult accessibility of the turbines on the open sea and the size of the gearboxes, maintenance is associated with high costs. Predicting the remaining service life as part of condition monitoring offers engineers the opportunity to continue operating the wind turbine until a predictable, economical maintenance date.
In addition, the gearboxes in cement mills, hydraulic pumps, or rolling mills also offer potential for the application of condition monitoring. The maintenance of such gearboxes is usually carried out preventively. In this process, worn parts are replaced at scheduled times regardless of their respective condition. In this way, safe operation is guaranteed at all times. At this point, condition monitoring offers the possibility to identify defective components and to plan downtimes for maintenance in a sustainable way. As a result, production interruptions can be reduced and the spare parts budget can be organized more economically.
From the examples listed, it is clear that gearboxes in many industrial plants must meet high expectations for operational reliability. Condition monitoring with estimation of the remaining service life offers engineers safety in operation and potential savings in the maintenance of damaged gearbox components.
About the Institute for Machine Elements at the University of Stuttgart
The Institute of Machine Elements (IMA) at the University of Stuttgart conducts research with approximately 40 employees in the fields of sealing technology, reliability engineering and drive technology. The reliability engineering department has been headed by Dr.-Ing. Martin Dazer since 2018. Research focuses on statistical data analysis, reliability test planning, reliability testing, lifetime prognosis, test methodology, modeling of system reliability of repairable and non-repairable components, and Prognostics & Health Management. In the context of basic research, previously unknown or not understood failure mechanisms in mechanics, electronics and mechatronics are investigated, described with the help of empirical models and thereby transferred into physically based functional models and failure mechanisms. In the field of application-oriented research and services, industrial partners benefit from holistic reliability analyses and efficient safeguarding solutions.